DevOps
Jenkins install on kubernetes in 3 simple steps
A step-by-step guide to install a production grade Jenkins devops tool using helm chart on Kubernetes to serve CICD pipelines for same or different environment.
Introduction
Jenkins is the most popular open source automation server. This tool helps developers and devops engineers to automate phases relating to building, testing, and deploying, facilitating continuous integration and continuous delivery.
There are many ways to install Jenkins server depending on the use case, platform and the environment requirements.
- Containerized install on Docker
- Binary install on Windows, Mac and Linux
- Install jenkins on public clouds
- Install jenkins on kubernetes based environment
Jenkins can be installed on Kubernetes in multiple ways :
- Install via yaml resources and Jenkins containerized image
- Install via Helm chart and manage parameterised configs
- Install via Operators
We would focus on the recommended and stable way of installing Jenkins on kubernetes platform via Helm chart.
Jenkins – helm chart
Helm being the package manager for Kubernetes, provides an elegant way to manage the deployment resources and configurations. It abstracts the install dependencies via “helm templates” and provides a single place for referring all the configs in “values.yaml”. Helm Charts provide “push button” deployment and deletion of apps, making adoption and development of Kubernetes apps easier for those with little container or microservices experience.
Jenkins helm chart’s are available from various repos.
$ helm search repo jenkinsNAME CHART VERSION APP VERSION DESCRIPTIONbitnami/jenkins 7.3.7 2.263.4 The leading open source automation serverincubator/jenkins-operator 0.3.1 0.3.0 DEPRECATED: A Helm chart for Kubernetes Jenkins...jenkinsci/jenkins 3.2.4 2.277.1 Jenkins - Build great things at any scale! The ...stable/jenkins 2.5.4 lts DEPRECATED - Open source continuous integration...I would recommend to follow the helm chart developed and maintained by the jenkins.io (i.e : jenkinsci/jenkins“)
Initial Setup
In order to install Jenkins on Kubernetes platform, Jenkins needs to be available as a containerized app. There are certain sub-components in Jenkins which need to be configured. The most important sub-component is “plugins“. Almost every capability of Jenkins server is managed by plugins. Thus, there are certain must have plugins, to be installed during the initial Jenkins setup.
Step1: Download the helm chart from the repo
$ helm fetch jenkinsci/jenkins$ ls -l | grep jenkins-rw-r--r-- 1 user user 67195 Apr 23 10:10 jenkins-3.2.4.tgz$ tar -xzf jenkins-3.2.4.tgz$ ls -l | grep jenkinsdrwxr-xr-x 11 user user 352 Apr 23 10:18 jenkins-rw-r--r-- 1 user user 67195 Apr 23 10:10 jenkins-3.2.4.tgz$ cd jenkins && ls -l-rw-r--r-- 1 user user 41275 Mar 15 18:12 CHANGELOG.md-rw-r--r-- 1 user user 1008 Mar 15 18:12 Chart.yaml-rw-r--r-- 1 user user 29194 Mar 15 18:12 README.md-rw-r--r-- 1 user user 205 Mar 15 18:12 Tiltfile-rw-r--r-- 1 user user 36102 Mar 15 18:12 VALUES_SUMMARY.mddrwxr-xr-x 27 user user 864 Apr 23 10:18 templatesdrwxr-xr-x 20 user user 640 Apr 23 10:18 tests-rw-r--r-- 1 user user 32625 Mar 15 18:12 values.yamlshellStep2: Prepare the configurations (values.yaml)
There are many configs related to Jenkins and kubernetes in the values.yaml, including below major ones :
- Jenkins worker image
- numExecutors: 0 (default values)
- adminUser and it’s initial password
- usePodSecurityContext: true
- agentListenerPort: 50000
- disabledAgentProtocols: [JNLP-connect, JNLP2-connect]
- csrf – defaultCrumbIssuer –
{enabled: true, proxyCompatability: true} - installPlugins – List of plugins to be install during Jenkins controller start
- agentListenerServiceType: “ClusterIP”
- ingress
- enabled
- hostName
- tls
- persistence
- networkPolicy
- serviceAccount
By default, the application expose the service to “ClusterIP”. We can either change the serviceType to “NodePort” or LoadBalancer to expose the app on a NodeIP and higher range post or on a LB_IP on exposed application port. We can even create an ingress resource by configuring the values.yaml as mentioned below :
ingress: enabled: true # Override for the default paths that map requests to the backend paths: [] # - backend: # serviceName: ssl-redirect # servicePort: use-annotation # - backend: # serviceName: >- # {{ template "jenkins.fullname" . }} # # Don't use string here, use only integer value! # servicePort: 8080 # For Kubernetes v1.14+, use 'networking.k8s.io/v1beta1' # For Kubernetes v1.19+, use 'networking.k8s.io/v1' apiVersion: "extensions/v1beta1" labels: {} annotations: {} # kubernetes.io/ingress.class: nginx # kubernetes.io/tls-acme: "true" # Set this path to jenkinsUriPrefix above or use annotations to rewrite path # path: "/jenkins" # configures the hostname e.g. jenkins.example.com hostName: jenkins.172.16.44.11.nip.io tls: - secretName: jenkins.tls hosts: - jenkins.172.16.44.11.nip.ioStep3: Prepare the Kubernetes environment for the installation
The best part for Helm installation that it’s platform agnostic, and works same on any kubernetes setup from any vendor or environment. So, we need to have a kubernetes setup and the cluster should be accessible from the host-VM being used to store helm charts and install Jenkins.
Step4: Prepare plugin installation for jenkins
Ideally, we can include the required and mandatory plugins in the values.yaml within the installPlugins section as below :
# List of plugins to be install during Jenkins controller start installPlugins: - kubernetes:1.29.2 - workflow-aggregator:2.6 - git:4.6.0 - configuration-as-code:1.47But, this process, might have some issues depending on the environment setup. Actually, during init phase jenkins tries to download and install the plugins and may either hang or slow down the install process.
So, there is a better way, where we pre-build the Jenkins image with the plugins of our choice and use the image to install jenkins on kubernetes platform. It’s benefits are that it speeds up the install process and allows to maintain secure jenkins plugins setup separately.
To perform the alternative plugin setup, we follow below steps.
- Assuming docker daemon is installed on Host-VM, we pull the jenkins image. (i.e: jenkins/jenkins:2.277.3-lts)
- Prepare Dockerfile to use above image and pass instruction (script) to install plugins during docker build plase.
kerfileFROM jenkins/jenkins:2.277.3-ltsCOPY plugins.txt /usr/share/jenkins/ref/plugins.txtRUN jenkins-plugin-cli -f /usr/share/jenkins/ref/plugins.txt- As seen above, we are passing the list of the plugins via ” plugins.txt “. Thus, we need to prepare this file and put the list of all the mandatory and required plugins as shown in below example(Note: we can get the huge list of available plugins at plugins.jenkins.io
kubernetes:1.29.2workflow-aggregator:2.6git:4.6.0configuration-as-code:1.47blueocean:1.24.4credentials:2.3.15workflow-scm-step:2.12junit:1.49git-client:3.6.0dependency-check-jenkins-plugin:5.1.1pipeline-utility-steps:2.6.1pipeline-stage-step:2.5nexus-artifact-uploader:2.13kubernetes-cli:1.10.0sonar:2.13performance:3.19monitoring:1.86.0email-ext:2.82allure-jenkins-plugin:2.29.0conditional-buildstep:1.4.1parameterized-trigger:2.40- Then, we can perform docker build and create the custom-jenkins image, which can be pushed to an image registry.
- In the values.yaml file, we can disable the plugin install step by updating as
installPlugins: []and. replacing the image:tag with the custom image create in the previous step.
Setup in devops environment
Step1: Jenkins install – kickoff
ell commands$ kubectl create namespace jenkinsnamespace/jenkins created$ helm install jenkins ../jenkins -n jenkinsNAME: jenkinsLAST DEPLOYED: Fri Apr 23 12:51:06 2021NAMESPACE: jenkinsSTATUS: deployedREVISION: 1NOTES:1. Get your 'admin' user password by running: kubectl exec --namespace jenkins -it svc/jenkins -c jenkins -- /bin/cat /run/secrets/chart-admin-password && echo2. Visit http://jenkins.172.16.44.11.nip.io3. Login with the password from step 1 and the username: admin4. Configure security realm and authorization strategy5. Use Jenkins Configuration as Code by specifying configScripts in your values.yaml file, see documentation: http://jenkins.172.16.44.11.nip.io/configuration-as-code and examples: https://github.com/jenkinsci/configuration-as-code-plugin/tree/master/demosFor more information on running Jenkins on Kubernetes, visit:https://cloud.google.com/solutions/jenkins-on-container-engineFor more information about Jenkins Configuration as Code, visit:https://jenkins.io/projects/jcasc/Step2: Verify the installation in kubernetes
$ kubectl -n jenkins get pod -wNAME READY STATUS RESTARTS AGEjenkins-0 0/2 Init:0/1 0 8sjenkins-0 0/2 PodInitializing 0 28sjenkins-0 1/2 Running 0 93sjenkins-0 2/2 Running 0 102s$ kubectl get all,secret,cm,ing,pvc -n jenkinsNAME READY STATUS RESTARTS AGEpod/jenkins-0 2/2 Running 0 3m15sNAME TYPE CLUSTER-IP EXTERNAL-IP PORT(S) AGEservice/jenkins ClusterIP 10.105.111.5 <none> 8080/TCP 3m15sservice/jenkins-agent ClusterIP 10.99.20.35 <none> 50000/TCP 3m15sNAME READY AGEstatefulset.apps/jenkins 1/1 3m15sNAME TYPE DATA AGEsecret/default-token-lv22d kubernetes.io/service-account-token 3 83msecret/jenkins Opaque 2 3m15ssecret/jenkins-token-jgqnk kubernetes.io/service-account-token 3 3m15ssecret/sh.helm.release.v1.jenkins.v1 helm.sh/release.v1 1 3m15sNAME DATA AGEconfigmap/jenkins 2 3m15sconfigmap/jenkins-jenkins-jcasc-config 1 3m15sconfigmap/kube-root-ca.crt 1 83mNAME CLASS HOSTS ADDRESS PORTS AGEingress.networking.k8s.io/jenkins <none> jenkins.172.16.44.11.nip.io 172.16.44.11 80, 443 3m15sNAME STATUS VOLUME CAPACITY ACCESS MODES STORAGECLASS AGEpersistentvolumeclaim/jenkins Bound pvc-45b0fbdd-1ce4-497c-94a5-3386e9fcf6f3 8Gi RWO standard 3m15sVerification
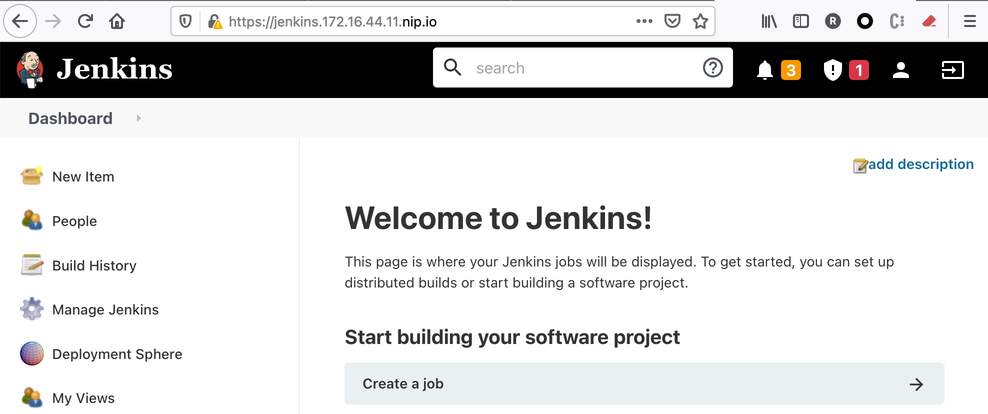
Thus , we can confirm that the installation is successful. The application can be accessed with this app-hostname as jenkins.172.16.44.11.nip.io which is exposed via ingress resources.
At this point, we can create a kubernetes-secret using the Jenkins >> Manage Jenkins >> Manage Credentials which would be used during pipeline job execution.
We can also observe an error notification, which shows that the Jenkins application lacks privilege on the kubernetes cluster.
Failed to initialize Kubernetes secret providerio.fabric8.kubernetes.client.KubernetesClientException: Failure executing: GET at: https://10.96.0.1/api/v1/namespaces/jenkins/secrets?labelSelector=jenkins.io%2Fcredentials-type. Message: Forbidden!Configured service account doesn't have access. Service account may have been revoked. secrets is forbidden: User "system:serviceaccount:jenkins:jenkins" cannot list resource "secrets" in API group "" in the namespace "jenkins".
In order to resolve, we can create a clusterrolebinding for Jenkins service account with a clusterrole.
$ k create clusterrolebinding jenkinsrolebinding --clusterrole=cluster-admin --serviceaccount=jenkins:jenkinsclusterrolebinding.rbac.authorization.k8s.io/jenkinsrolebinding createdThus, the installation of Jenkins is completed and operational in Kubernetes cluster.